Thursday 8 December 2016

The Rosa shirt - first day style

I started my new job this week. It was pretty strange (and nerve racking) to be the new girl again after more than 9 years at the old place. I find that it always helps to have something new to wear on the first day!  I actually finished this project a few weeks ago but have been saving it to wear for the new job. 

I bought the Rosa shirt and shirt-dress pattern from the Tilly and the Buttons stand at the Handmade Fair, only a few days after it was released. I was excited about making this as I've never made a shirt before and there were a number of new techniques. The styling is very 70s which is an era I love. I also bought some gorgeous 'raindrop' fabric by Cotton and Steel from Maud's Fabric Finds on the same day. I was torn between grey/blue and grey/hot pink. I went for the hot pink in the end and bought some matching hot pink buttons from John Lewis to match. I was a bit nervous about all the topstitching in this project so decided to just use a coordinating grey thread in case I made any mistakes. I think this was a good choice in retrospect as additional pink stitching may have looked too much with the pattern on the fabric. 

The first thing that struck me was how many pattern pieces there were in this project. It too forever to trave off and cut out. I also managed to get one of the collar pieces wrong when cutting out so had to re-do this. The shirt uses princess seams with a mock-felled seam finish. Both of these are new techniques to me, but Tilly's instructions were fabulous as usual and I managed to get the hang of both pretty quickly. The topstitching was ok in the end, I just took my time and managed to finish it neatly.  I also took my time with the collar and am over the moon with how it turned out - I've struggled to get nest collars on other projects and this success was definitely down to the clear instructions. 

The sleeves are turned up, with a button tab to hold them in place. I tried this, but didn't like the look of the wrong side of the fabric showing. I used the fold up technique from the Poppy playsuit by Sew Over It to give the impression of turned up sleeves, but showing the right side of the fabric. The only mistake I made was the positioning of the top button. I was annoyed with myself about this, but it isn't that obvious when on, so not too bad.  I didn't have to make any adjustments to the do at all. I'll be making a dress version very soon!

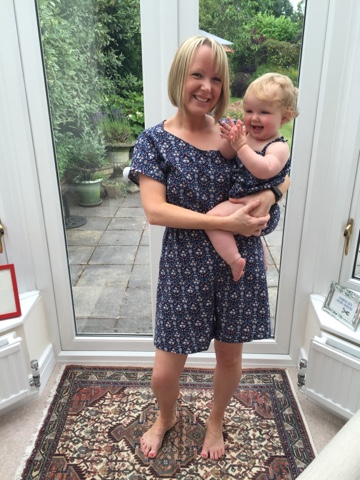
Here I am wearing it on my first morning:


Sunday 4 December 2016

Heather - the cosiest winter dress ever?

I love wearing jeans, but sometimes it's nice to pull on a casual dress and tights. Somehow it feels a bit more dressed up, but for very little effort - win. When I saw the new Heather Dress pattern from Sew Over It, it fitted the bill perfectly. 

This is a PDF only pattern, which is really annoying. As I've said before, I would happily pay a couple of extra pounds so that I don't have to spend an entire afternoon cutting the pattern out and sticking together with sellotape. However, I understand why the indie pattern houses release patterns like this and it does at least mean you get the pattern straight after buying it. 

For my first attempt at the Heather Dress, I used an organic cotton interlock knit bought from Maud's fabric finds at the Handmade Fair. It is much more sturdy than a lot of knit fabrics and was lovely to see with. The best thing about sewing with stretch fabrics is being able to sew most of it on the overlocker which saves a huge amount of time. I was feeling lazy/ impatient when I made this and used a zig zag stitch rather than a twin stretch needle for the hems and to finish the neckline because I couldn't be bothered to sew up my machine for the twin needle. I think it looks fine, although the extra effort would probably have given a more professional finish. I went for the size 10 as usual in Sew Over It patterns and while it fitted fine around the shoulders and arms, it was too big in the body. I haven't altered it yet, but will take a couple of cms off the sides. 

In this picture I am gathering the dress together at the back with my hand, so it looks like it fits better than it actually does:


I also bought some striped French Terry from the Sew Over It website to make another Heather Dress. I spent ages trying to pattern match the stripes on the side panels with the front and back panels and failed miserably. I think I can just about get away with it, so I'm still planning to wear this out and about. My Mum has just made a version of this dress in striped fabric as well and she made the stripes on the side panels vertical, thus eliminating the challenge of pattern matching- wish I'd thought of that! I learnt my lesson on the fit and took a much bigger seam allowance down the sides and am happier with the fit. It is more fitted without being too tight, and fabric is so warm and comfortable, I'll be wearing this loads:


I've now received my Coverpro machine (although not had time to play with it yet) - this should make it even easier to sew projects like this. 

Wednesday 30 November 2016

Out to lunch with the Pussy Bow Blouse

This is my last week at work, I will be leaving on Friday (after 9 years) to start a new job next week. Between all the mixed emotions and handovers, I have been focusing on sewing in the evenings.  I've been stitching a new work wardrobe for starting my new job, more of that to follow. For now, I want to focus on my last week here, and a lunch date with my fantastic colleagues (and friends) to say goodbye. 

I bought the Pussy Bow Blouse pattern and some lightweight crepe to make it in from the Sew Over It stand at the Handmade Fair (yes, still working my way through that stash!). I had originally planned it as a smart work blouse to wear with a pencil skirt. However, my new job is casual dress, so I'll be wearing it with jeans instead!  It's a pretty versatile pattern which can be dressed up or down. 

The Blouse is relatively simple to construct. I chose to make version 1, with a high bow. The fabric was quite slippery, which made it harder to work with, but feels like the right fabric for this type of blouse. The hardest part of the whole project was the rouleau loops for the button fastenings at the cuffs. I truly hate turning out rouleau loops, so invested in a tool to do it. It was still almost impossible and so frustrating! Then, after I finally managed it, I sewed them too close to the cuff and didn't leave enough loop to go round the button. In the end, I stitched the loop to the edge of the other cuff to give the impression on a button fastening instead. 

The Blouse is a lovely fit, and a nice way to dress up jeans. Now, off to my lunch (and I'll try to hold back the tears!) x


Tuesday 22 November 2016

Back in action with the Cleo Dress

If you follow me on Instagram (@adventuresinfabric), you will have seen that I have been out of action for a while following surgery on my right hand. While it was nice to binge watch 'The Crown' (OMG the outfits!!), I was dying to get stitching again. I'm pleased to say that my recovery was quick and I was able to start sewing again after less than a week. 

First on my list was the latest pattern from Tilly and the Buttons - the Cleo Dress. I had been really excited about this pattern from the teasers I had seen, but was less enamoured when I saw the full pics the pattern was released with. It was only when I saw other bloggers sharing photos of their versions that I decided to buy the pattern. I think it was the pink version that put me off, which was silly of me as I should be able to see beyond fabric choice to the pattern itself!

Although I have a mountain of a fabric stash, there was nothing there that I felt was right for this project. The style of the dress lends itself to corduroy and I found some olive green corduroy on My Fabrics for £2.80 a metre - bargain! I bought the dungaree clips from Tilly at the same time as buying the pattern. 

There aren't many pattern pieces to this dress, so it's relatively quick to make. The centre seams use the mock-felled seam method (also used on the Rosa shirt by Tilly, not yet blogged), which gives a really nice finish. The main challenge with this project is the sheer amount of topstitching. I was pretty nervous that any uneven or wobbly lines would show up, but I actually enjoyed doing it, and am beyond chuffed with my neat lines of stitching, shown here on the front pocket:


I ended up making the shoulder straps too short at first and the dress was ridiculously short, so I adjusted these and am really pleased with the final result:
 

Here is the back view:


I know I will get loads of wear out of this dress. I'm planning a red corduroy version next (might be because Polly has one similar....)

Sunday 6 November 2016

Wedding guest outfit - the Loretta dress

When a wedding invite landed on our doormat a while ago, (unsurprisingly) my first thoughts were of what I could make to wear. The Loretta jewel neckline dress came with issue 20 of Love Sewing magazine last November. I loved the pattern, but I had already planned my Christmas party dress at that point. I've been waiting for an occasion to make it for ever since. 

I decided on the pattern before my trip to the handmade fair and was on the lookout for fabric. I struggled to find something until just before we were due to go home and I found the perfect fabric at the Eternal Maker stall. It is a very thick black cotton with amazing gold design. From a distance it has the look of a traditional brocade style, but close up you can see skulls, rhinos, insects and other creatures in the intricate gold pattern. The thickness of the fabric is perfect for this dress as it needs something with a good structure. 

I cut out the size 10 and decided to decrease the size of the darts and also reduce the seam allowance at the waist to accommodate my tum. I went for the version with 3/4 length sleeves so I didn't have to wear a jacket as well. The pattern only gives sizing measurements, not the finished garment measurements. I should have measured the pattern but I went ahead and made the adjustments based on my experience of other patterns. It was far too big, especially over the hips. I ended up taking it in by at least 4cm on each side over the hips, re-stitching the darts as originally intended, increasing the seam allowance to about 2.5cm for most the the bodice and skirt and taking it up quite a bit at the shoulders so it wasn't too low-cut. I made more alterations to this to get a good fit than I have had to make on any other project. 

The fabric really makes this project and I was delighted to get a few compliments when I wore it:


Here is another pic


What a fabulous wedding it was! Congratulations Harry and Emma and thank you for inviting us to be part of your special day x


Sunday 30 October 2016

Holiday stitching - pineapple dress and matching camo t-shirts

I've been quiet this month, not through lack of sewing, but because I've been waiting to get pictures of my latest makes. My last couple of projects have been for our annual October half-term Tenerife trip and I thought it would be nice to get some pics while we were away. We got back last night after a lovely week of sun, sand, lidos, new toys, tapas and relaxing. I also got the photos so I can finally blog about my last few makes. 

The first project was another Shannon dress from Love Sewing magazine. I absolutely love this pattern and have worn my black and grey version loads already. My fabric choice this time was a brilliant pineapple print, also from Girl Charlee at the Handmade Fair. I fell in love with this fabric and bought it on impulse, even though it's totally impractical for autumn/ winter. I decided I would use it to make something for my hols and decided on the Shannon dress because it is so comfortable and so quick to sew. There's not much to say about the construction other than it only takes an evening to sew up on the overlocker. I'm still waiting for my coverpro machine to arrive so I had to finish it on the normal machine but I'm still really pleased with the end result - it's just a shame it's going to be put away until next Summer now!


I also bought some camo jersey fabric from Girl Charlee to make a t-shirt for Gareth's birthday. It's not for a couple of weeks, but I wanted to finish it before we went away as I knew I wouldn't have much chance afterwards. I used the men's t-shirt pattern from the GBSB Fashion with Fabric book (from the series before last). I used this pattern to make him a t-shirt ages ago and knew it was a good fit. The best thing about sewing with jersey is how quick it is, and this fabric has a really nice feel. This was another project I could finish in an evening.  I decided to give it to Gareth early so he had a new t-shirt for holiday. 

I had miscalculated how much fabric I needed so ended up with over a metre spare. My sister made the Scout Tee from Grainline studios recently and I fancied making it to, so managed to cut the pattern from the leftover fabric. I liked the instructions and enjoyed sewing this top. However, it is huge! I think I will make the next size down next time and will alter this one as it looks like I'm wearing Gareth's!

Thomas took this picture of us wearing them on holiday (please note - we only wore them at the same time for the photo, we didn't actually go out wearing matching t-shirts!):


Rather excitingly, I posted this pic on Instagram while we were away and Girl Charlee included it in their October knit-picks on their blog 
here 

I also received an email update from the brilliant 
SoZo which was a round of Anya bags and included mine. 

It's lovely to be recognised for doing what I love!

Sunday 2 October 2016

Sunday style: T-Shirt dresses

One of the stalls I was most excited about visiting at the Handmade Fair was Girl Charlee fabric. I've read lots of sewing blogs about their beautiful jersey fabric and I had a few projects in mind. One was the Shannon t-shirt dress from the latest issue of Love Sewing magazine. The simplicity of this pattern really appealed - both in terms of the style and ease of sewing!

I wasn't disappointed when I visited the stall - I bought more fabric than I needed and could have bought more than that. The fabric I chose for this project was a black and grey chevron jersey. Although a t-shirt dress could be quite Summery, the darker colours work well with tights and boots for this time of year. 

There are only two main pattern pieces plus bands for the neck and armholes. I used the overlocker for most of the seams. I finished the neck and armholes with a narrow zig zag stitch. This was an optional step, but I found from the Agnes pattern by Tilly and the buttons that it helps the neck band sit better. The best thing about this project was how quick it was - only just over an hour, including the cutting out. 

I had quite a bit of fabric left so decided to make a matching dress for Polly. I looked for a baby t-shirt dress pattern but couldn't find what I wanted anywhere, so ended up drafting my own using one of her tops as a basis for the top and basing the design and shape on the Shannon dress. Apart from the time spent looking for a pattern and then drafting one, this was even quicker than my dress. I used exactly the same techniques to attach the bands at the neck and armholes. 

I'm really pleased with these, especially drafting my own pattern for Polly's. I love using jersey for kids clothing as it's so comfortable and moves well with them, which is great as she's not far off starting to walk. My dress is super comfortable - perfect for going out for Sunday lunch!

Here we are together:


And here's my dress:


I've got lots more jersey so will definitely be sewing up several of these!

Monday 26 September 2016

The 'famous' Joan dress, mark 2

By sheer coincidence, I was two thirds of the way through this latest project when I found out I was one of the winners of the Stitcher of the Year competition with the same pattern - the Joan dress by Sew Over It. I actually bought all the supplies for this months ago directly from their website when they had a flash sale on. I've put off making it for a while, partly because i knew how long it would take and partly because it's harder to get excited about sewing work clothes!  It is a beautiful dress though and I need some new smart clothes for work, so I decided I needed to bite the bullet. 

The fabric I chose was a dark green luxury crepe with a gold lining. I used the Sew Over It colour-match service for thread and zip which was ace as I received a parcel with everything I needed to make the dress. My Mum made this dress using the same luxury crepe in purple earlier in the year which looked gorgeous so I was looking forward to the finished result.

I didn't enjoy sewing with this fabric at all, it was really thick and hard to pin while also really slippery, which was unexpected. On the plus side, I managed to attach the lining to the kick pleat first time - it really flummoxed me last time I made the dress, not sure why!  The kick pleat itself is probably the worst part of this project, I just can't seem to get it to sit properly. 

This is still a big project as the dress is fully lined, but it definitely seemed quicker than last time (despite stopping halfway through to make the Poppy Playsuit). Hopefully that means I'm getting better at sewing. It is really comfortable due to being fully lined and I know I'll wear it loads. I wore it today and I did find that the collar keeps sticking up so will add a few hand stitches to keep it in place. Here is the finished result (please excuse how tired I look, it's the end of a long day and I was up at 5 this morning to go to Edinburgh!):


Wednesday 21 September 2016

Got my sewjo back - Poppy in 2 nights

I've been dying to get my teeth into a decent project after barely sewing over the Summer and only accessories for presents since then. I also wanted to rectify my recent run of disasters. So I'm pleased to say my latest make was a success. I decided to make the full length version of the Poppy Playsuit by Sew Over It using a black floral crepe I bought from their stall at the Handmade Fair. 

I made the short version of this pattern to wear on holiday, and I loved the fact it was quick and simple to sew. However, I got the sizing wrong with that and felt it looked unflattering because it was too big. I cut it out in the smaller size (8-10) this size and it fitted much better. Because it's a loose style with an elasticated waist, I can wear the smaller size and fit it to my slightly out of proportion shape!  The fabric was quite slippery but I didn't have too many problems sewing with it, except hemming the trousers when I kept getting little tucks and having to unpick and start again. I machine hemmed out of laziness, it would have been better to sew by hand. I actually ended up making the waist too big and having to take the elastic in to get it too fit. The trousers were ridiculously long on me at first, even with heels on, so I took up by an additional 3cm (although I could have taken them up further). 

The playsuit looks really different in the long version made with this type of fabric and it's good to get something new from a pattern I already own. I'm becoming a fan of the pattern and will probably make another short one for next Summer in the right size. The only gripe I have with this pattern is the fabric requirements it states - I bought at least 1.5m more than I needed. On the plus side, it means I have enough to make a blouse with as well. 

Looking forward to wearing this out tomorrow night:


Monday 19 September 2016

Fabric shopping and very early Christmas

On Friday I made my annual trip/ pilgrimage to the Handmade Fair at Hampton Court. This was the third time I'd been and it was as fabulous as ever (at least it was for sewing geeks like me). We also held a ridiculously early Christmas celebration as a family which involved homemade presents all round. 

First, the Handmade Fair AKA fabric shopping heaven. In anticipation of how much fabric I was going to buy, my Mum and my Aunt (who came with me, along with my sister) both gave me early birthday presents of money to spend at the fair. And what a brilliant present it was. Each year, there have been more fabric stalls and this was the best yet, with Sew Over It, Fabrics Galore, Maud's Fabric Finds, Girl Charlee and the Eternal Maker to name but a few. I ended up buying fabric for 15 projects (and heavily supplementing that birthday money) and two new patterns (including the new Rosa shirt pattern from Tilly and the Buttons. My problem now is that I can shop faster than I can sew!


It wasn't just about the shopping - we went to a couple of workshops which were great fun (although our makes left something to be desired) and went to a talk with Patrick Grant (this was a bit of a disappointment as we wanted to hear more about the Sewing Ber than we did. Throw some prosecco, lots of free sewing-themed badges, free Florentines and g&ts into the mix and it was a great day all round. Already planning our trip for next year - need to get saving!

The next day, we had a Christmas breakfast in Knowle - My aunt and uncle are off to Crete for Christmas so this was the last chance we could all get together to exchange presents with them. As ever, the brief was homemade gifts made from materials costing less than £10.

For Glenda, I made the Ruffle Bag from issue 26 of Love Sewing magazine. I used red stretch cotton for the bag and red Liberty Tana Lawn for the lining, both leftover from the Lilou Dress I made back at the start of the year. The bag was relatively straightforward to sew, with the ruffles themselves taking to most time. I already ad a red zip in the right size, so this actually cost nothing - bonus! I left out the inside pocket because I didn't have a small enough zip but I still think it's really useable. The only thing I struggled with was attaching the straps as the instructions weren't very clear - I will go with my instincts next time I make it and will attach it the way I would normally. Hopefully she will be able to wear it for all those nights out in Paleochora!


For Brian, I made the tweed patchwork scarf from issue 21 of Love Sewing magazine. If this looks familiar, it's because I made the same scarf for Dad last Christmas. I used the remaining tweed trousers and skirts bought from charity shops and soft needlecord for the back of the scarf. It's a simple project but looks really professional thanks to all the topstitching - this won't be the last time I make it. Yet again, this was a stash-busting project so effectively cost me nothing!


Final bit of news this time is that I found out that I was one of the winners of the Stitcher of the Year competition in Love Sewing magazine and I have won a Janome Coverpro machine. I'm over the moon and a bit overwhelmed as I've only been sewing properly for 3.5 years.  Can't wait to try out my new machine- just need to find space for it!

Sunday 4 September 2016

A series of sewing disasters...

I've been pretty quiet of late, partly because we have been on holiday twice so not much time for sewing, but mainly because my latest makes haven't exactly been my proudest sewing moments.  Unusually, my latest projects have all been for other people (I'm usually a bit of a selfish sewer!).

It is my Mum's birthday next week and I decided to make her an arrowhead ribbon necklace from Love Sewing magazine. I had to search for ages to find 5cm wide grosgrain ribbon, but managed to source some gunmetal grey ribbon which I thought would go well with her wardrobe. I've never used this kind of fabric manipulation technique before and I enjoyed seeing the arrowhead design come together as I was sewing and ironing. As I was sewing, it was obvious that something wasn't right. The necklace was much wider than the version pictured in the magazine. I even posted a picture on Instagram and the pattern designer confirmed that the width of the ribbon should have been 2.5cm and it should also be longer than stated in the magazine. Sadly, I don't think it's wearable, but I gave it to Mum anyway in the hope she can find some other use for it! I will make this again in the right width at some point as I think it could look great. 


It was also Thomas's birthday recently and his latest obsession is Power Rangers. I managed to find some (extortionately expensive) Power Rangers Dino Charge fabric on etsy to make him some pyjama bottoms. I used the same pattern I have used a couple of times before but decided to make the next size up (age 5). They were enormous!  Luckily I was able to alter them easily so not too much of a disaster and definitely a big hit with the birthday boy. 


Finally, it is my 6th wedding anniversary today. 6 years is either iron or sugar. I found some fabric with jars of sweets printed on it (for sugar) and though I would make Gareth some boxer shorts. Not very original I know, as I've made him several pairs before, but he does need some new pants! I decided to save time when cutting out by folding the fabric in half horizontally. I hadn't considered the design on the fabric and the sweet jars on one piece were upside down. I can't believe I made such a basic mistake - think my brain is still in holiday mode. There wasn't much I could do, so I went ahead and made them anyway. 


Not a good run at all - think I'll stick to selfish sewing for a while!


Wednesday 20 July 2016

Holiday sewing part 4 - vintage Liberty Fi Fi

On to the fourth and final holiday sewing project (there would have been many more but I ran out of time!).  I'm obviously hoping for hot weather and I have found the Fi Fi pyjamas from Tilly and the Buttons I made back in February to be perfect for Summer.  I decided to make another pair to take with me as we are away for a couple of weeks. 

My Mum was given some vintage Liberty fabric a while ago. She made my sister a Summer dressing gown with it for her birthday and gave me what was left. It is beautiful tana lawn, but the design probably isn't something you would make blouses or dresses from as it is a bit dated. However, it is perfect for sleepwear so I decided to use this for the Fi Fi. It is pink floral, so I bought some pink bias binding for the straps. The pattern includes self-made bias binding but I was up against it, time wise, and I also like the look of contrasting straps and trim. 

This is a relatively quick sew due to the small size of the camisole and shorts, despite quite a few details. As it is the third time I have made this (I also Mae a set for my sister for her birthday), I managed to sew it pretty quickly.  For some reason, the French seams really flummoxed me this time. Every time I went to pin it, I reminded myself to sew wrong sides together, then went on auto-pilot and sewed right sides together. I think I ended up unpicking 4 or 5 seams in the end. I'll put this down to rushing and possibly being distracted by holiday packing stress!  The pink binding looks good, but I ordered it online and it is much thicker fabric than I would ideally have used, so I'm a bit concerned about how comfortable it will be - hopefully it will soften in the wash. 

Although the fabric isn't necessarily something I would have chosen, it looks good made up and definitely has a retro feel. It was lovely to sew with (as all Libert fabric is), and will be comfortable to wear. Here is the finished result:


I was very excited to see that it matched my holiday nails too:


Right then, just need to get all this stuff packed and survive a long haul flight with two small children then I can relax and enjoy my hols!

Saturday 16 July 2016

Holiday sewing part 3 - Playsuits!

The holiday sewing continues at pace. This week I decided to try out the short version of the Poppy playsuit which is the newest pattern from Sew Over It. When the pattern was released, my sister sent me a message within minutes asking if I was planning to get it. Silly question really... I got some half price cotton lawn from John Lewis a couple of weeks ago especially for this project and also decided to make the drawstring romper for Polly in matching fabric from the One Little Minute blog. I saw this tutorial on Facebook a while ago and saved the link as I loved it. 

The Poppy playsuit is yet another pdf pattern (sort of getting used to them now).  Strangely, the sizing was different to other Sew Over It patterns and I fell between the 8-10 and 10-12 sizes so went for the larger one, which was probably a mistake in retrospect. I am planning to make the long version for nights out in the Autumn and will go for the smaller size as I think the larger one is unflattering. It is very comfy though and will be perfect for holiday.  

The playsuit was an easy sew, with elasticated waist and hook and eye fastening at the back. It took a bit longer than an evening as suggested, but not much. 

Polly's romper suit was more fiddly, although all quite straightforward.  It was the first time I have made rouleau straps and it will be the last until I buy some kind of tool to help turn them out. As it was, I used a chopstick and a lot of patience (and mad Gareth take over when I got too frustrated).  It was all worth it when I saw Polly wearing it - chubby baby cuteness overload!!

Here we are in our matching Playsuits:


And one of those chubby baby legs:


Monday 11 July 2016

Holiday sewing part 2 - another Bettine

I'm marching on with the holiday sewing projects - nothing like a deadline for motivation (or fear that I'll have nothing to wear on my hols!).  I took a trip to John Lewis last weekend as I'd heard they had a sale on in haberdashery. It wasn't my usual store and the fabric selection was much smaller with not much in the sale. I did pick up some cotton lawn for another project, but then got tempted by some beautiful (non-sale) Amy Butler cotton. It was more than I had planned to spend but Gareth wasn't around to see and I knew it would make a fabulous Bettine!

The cotton is thicker than I would normally use for this dress but it still has some drape and the design is really striking. Following some advice I learned from the Great British Sewing Bee (congratulations Charlotte btw - you were my favourite from the start!), I refolded. Before cutting so the main flower design went centrally down the front and back bodice and skirt pieces. I'm so pleased I heard this tip - it's obvious really, but I've always tended to just go with folding selvedge to selvedge and the design looked so much better this way. 

I chose to make the version with pockets (always love a pocket) and sleeve tabs as I love the extra details. I remembered it was possible to squeeze it into two metres of fabric from my last Bettine and made sure I added the right seam allowance for the facings this time. The fabric was a dream to sew with, it is so soft. 

It was worth treating myself to this fabric as the end result is great and it's so soft and comfortable to wear. Now onto the next holiday sewing project!


Monday 4 July 2016

Holiday sewing part 1 - Tulip Skirt by Sew Over It

I'm off on my hols soon (super excited!), and in the past I would have spent a lot of time and money shopping for a holiday wardrobe. Not so now - I can sew myself one instead!  I've got a few projects in mind for my holiday, and I'll be stitching like mad over the next couple of weeks to get them finished in time. 

The first item on my sewing 'to do' list was the Tulip Skirt from Sew Over It. I bought the pattern when it was first released and had earmarked some lovely nautical fabric bought at the Handmade Fair to make a summery skirt. I love this fabric so much that I'm planning to make a bag and possibly even a hat as well if I have time with the leftovers. 

I was nervous about making a tulip skirt as I worried it would be unflattering, given my shape (post two v big babies!).  I usually fit a size 10 in the Sew Over It patterns and I cut this out without thinking or measuring - oops!  After putting in the pleats and back darts, I fitted it to my dummy and realised there was no way this was going round my waist, despite the fit being perfect everywhere else. I almost gave up, then remembered some advice my Mum gave me ages ago when I made a dress too small by accident- take out some of the darts. I took out the wider two back darts and cut a new waistband. Yay - it worked, and had the added benefit of making it stick out less at the hips, which is more flattering for my shape. 

The invisible zip was pretty much the best I've sewn, and I managed to get the waistband to sit perfectly level either side - something I normally struggle with. I took an extra centimetre off the length when hemming as I'm so short. 

Overall, I'm pleased with this and will definitely make it again, probably in the shorter length to wear with tights in winter. I haven't got a photo of me wearing it (pasty legs and bad hair on the day I made it), so here it is on the dummy:


Saturday 18 June 2016

Back to the classroom (except at home!) - Carrie Trousers and Silk Cami

I made a promise to myself a few weeks ago that I wouldn't buy any new fabric or sewing patterns until I have worked my way through all the projects on my to do list. I broke the promise almost as soon as I made it when I saw that Sew Over It were offering online classes in trouser making and fitting. I have been tempted by their Ultimate Trousers pattern for ages - I keep seeing beautiful versions on Instagram. The classes include the pattern for those and also for Carrie Trousers, which are loose Summer trousers made in soft, drapey fabric. 

So not only did I sign up for the classes immediately, I also bought some fabric from their online shop to make them in.  Even naughtier, I treated myself to their silk Cami pattern and some fabric got that as well. I really must stick to my promise for a while now!!

I made the trousers in a black rayon with a rose print and the cami in a plain black rayon to go with them. Annoyingly, both patterns only came as PDFs and I have made my thoughts on sticking them together clear before. I really enjoyed the online classes - Lisa is an excellent teacher, although I confess that I skipped quite a few of the videos as these trousers are pretty straightforward to sew. I think I will find them more useful for the ultimate trousers as I imagine they are a lot trickier. The cami was also a simple project, but I'm now in love with both patterns - quick to sew, look great and almost as comfy as going out in your pjs (but more socially acceptable!). It is tempting to break that promise again and sew up more of both for Summer - they would be perfect for my holiday....

I wore both last night for a work night out, hence the glamorous surroundings of the office in this pic (I definitely wouldn't sanction any of the photos from later in the evening....):


Monday 30 May 2016

Reflections on my first Me Made May

This year I took part in my first ever Me Made May (a sewing challenge all about wearing handmade clothes every day during May).  As I haven't been sewing as long as some of the incredibly talented people taking part, my pledge was to wear at least one me made item each day in May. 

So the stats are in:
31 days (and 31 different photos, thanks to my long-suffering photographer!)
7 items worn twice
3 baby dresses
2 matching outfits 
1 pair of boy's shorts
1 hand knitted tie
1 sister made item
3 mum made items

I'm not sure if it is considered cheating to wear items made by others but I figured it would be OK, as the main thing is that they are handmade and individual. 

Taking part has been great fun, and I have loved seeing what other people are wearing on Instagram. I've now got tons of new patterns to add to my 'to do' list! Some people have worn 100% homemade every day, including underwear and shoes - that is truly impressive!  I've also enjoyed the discipline of planning what I'm going to wear, and stopping myself from wearing the same few things day in day out. You realise just how many clothes you own when you are trying to wear different items every day. Taking part has also made me think about what I need to make more of and what I need to stop making. I'm a sucker for pretty patterned fabrics, but I've realised I need to make more plain, 'staple' items - hence my latest make was a plain black blouse!

Over and above what I have learned from a sewing perspective, I have found the challenge to be really good for my wellbeing. I know that sounds weird, but it has helped me to have something fun to focus on. I've been going through a stressful time at work, and this has been something which has really taken my mind off that. 

It goes without saying that I'll be taking part again next year (sorry Gareth - that means more early morning photo shoots!).  As I will have more handmade clothes by then, I'm hoping I can get through it without any repeat wears. 

Here is my outfit for today (31st May):


Monday 23 May 2016

Matching outfits (again!)

It's cheesy, but I've got a bit of a thing for matching parent and child outfits. I'm making the most of dressing the kids in outfits to match ours before they start refusing to wear them! I've previously made Polly a pair of Summer trousers and a Christmas party dress to match my own trousers and dress, and the boys had matching pyjamas for Christmas last year. For Polly's first birthday last week, I wanted to make an extra special dress for her, with a matching top for myself. I chose New Look 6217 for my top and the Flo Dress from Love Sewing magazine for her dress. I had been looking for a project to use some butterfly print grey cotton bought from Fabrics Galore at the Handmade Fair last September, and I thought it would be perfect for both of these. 

The top was a super-quick sew - only two pattern pieces. I used a button from my stash for the back neck fastening and some leftover bias binding for the neckline.  I made it a size larger than usual as the measurements indicated I should. I will make it in my usual size next time as it does feel a bit big. The neck is also far too wide for me, so I will need to adjust that too. I really like the length and the curved hem, plus it's a great versatile top that goes with jeans or tucked into a pencil skirt. 

The Flo Dress for Polly used quite a lot of fabric as the skirt is very gathered - I like this as it makes it feel like a special occasion dress. The bodice is fully lined, which is great as it is designed to be worn without a vest underneath. It was pretty quick to make (because baby clothes always are!), and I absolutely love this pattern. I finished it with a royal blue ribbon to tie in with my Ultimate Pencil Skirt (I had planned to wear this as the butterflies have the same colour blue in them, but it ended up being too cold and I wore jeans instead). The pattern has lots of sizes and I will definitely be making it again in future. 

Here we are on her first birthday:


My Mum had also made Polly a couple of dresses for her birthday and made me a Susie blouse to match one of them, so we got to be matching girls again:


Here we are at Christmas in our matching party outfits:


And those matching Summer trousers:


She'll be so embarrassed when she's older.....

Monday 9 May 2016

Sorbetto on the razz!

I very rarely have a need for 'going out' clothes nowadays, as most of my nights out consist of a glass of wine or g&t sat on the sofa watching telly, usually wearing (homemade) pjs. However, I had a couple of work nights out last month, so thought it would be a good opportunity to make a new top. I had a smallish piece of green crepe burning a hole in my stash which I was keen to use. My Mum bought it for me as a remnant from Sew Over It at the Handmade Fair in Manchester back in November for the princely sum of £3. There wasn't much of it, so I decided to make a Sorbetto (freebie pattern from Collette Patterns).  I have made a couple of Sorbettos before and they are a great stash-buster. 

The crepe was actually easier to work with than I thought. Sorbetto has a wide pleat down the front, and I thought it might be tricky to get a neat finish, as I have only made it in cotton before. The crepe is pretty thick which gave the pleat some stability. The main problem I had making this was the bias binding which is used around the neckline and armholes. I had several attempts at making my own binding using the crepe, with no success whatsoever. I couldn't iron the creases in, and knew I wouldn't be able to get a neat finish. In the end, I used a length of black bias binding I had leftover from another project and just hemmed the armholes.  I'm actually quite pleased with the end result, the black trim brings it all together when worn with black jeans.  

I wore the Sorbetto for both nights out, and it's great to wash and iron. The only downside is how hot it is to wear on a warm evening! Here is the finished result:


Not bad for £3!

I'm now 10 days into my first ever Me Made May, and I'm absolutely loving it!its made me realise how many me made clothes I have now. I've also enjoyed the opportunity to stop falling into the rut of wearing the same old things all the time. I'll be posting a summary of my thoughts and learnings at the end of the month. In the meantime, you can see my daily outfits on Instagram @adventuresinfabric

Wednesday 27 April 2016

Me Made May 2016 - my pledge

I, Alex Howard of alexsadventuresinfabric.blogspot.com and @adventuresinfabric on Instagram, sign up as a participant of Me-Made-May '16. I endeavour to wear at least one me made item each day for the duration of May 2016

How exciting - my first Me Made May!  I've been keen to take part for a couple of years, but life and stuff has got in the way of me participating.  I'm really looking forward to the challenge and will let you know how I get on x

Monday 25 April 2016

A new wardrobe staple - the Susie blouse

The Susie blouse pattern was released as a pdf pattern only last month by Sew Over It. Having had success with the Joan Dress and the Ultimate Pencil Skirt patterns, I bought it straight away. It's a pretty versatile pattern with three sleeve lengths that can be worn for work or more casual with jeans. As the pattern was on special offer, I treated myself to some lovely cotton lawn from Maud's Fabric Finds to make my first version with. 

The one downside (and I think it's quite a big one) is that it is only sold as a pdf.  I used to buy pdf patterns when I first started sewing to save money, until I realised I would happily pay a few extra pounds to save myself the hassle of printing, cutting and sticking together with sellotape. It took over an hour of my precious and limited sewing time just to get the pattern together. Once I'd finally done this, I was unsure about which sleeve length to make, so I asked Thomas (age 4).  He was very clear that I should make the long sleeved version, so that's what I cut. 

I found the fabric lovely to work with, as I have with other cotton lawns from Maud's. The blouse is a pretty quick project with no fastenings and only darts at the bust. I ended up having to fold and hand stitch the facing together at the v-neck as it kept poking out, even though I followed instructions. The long sleeved version includes a cuff at the wrist, so involves slightly more sewing than the other versions, but not much. 

When I first tried this on with jeans, I felt like the body was too baggy and was actually unflattering. However, I tried it tucked in to a pencil skirt and loved it. My Mum and Sister have also recently made versions of the Susie blouse, and they said the same. I will definitely be making again, probably as a work wardrobe staple, but I'd try it in the next size down to wear with jeans. 

Here is the finished result:


Sunday 10 April 2016

Birthday presents - the Anya bag

There are a couple of people with birthdays in April who I wanted to make presents for this year. I bought the Anya Bag pattern when it was released before Christmas by So Zo. Although it was a bit late for any presents last Christmas, I thought it would be the perfect make for quite a few people I know. I love the retro styling and the fact it doesn't use much fabric. 

I bought some fabulous and ridiculously cheap fabric last time I was in Ikea specifically to make a few of these bags. I hadn't intended to even look at the fabric there and Gareth was amused that I had found yet another place where I could add to my stash. I've got some black cotton lawn I bought ages ago with a project in mind (I can't remember what now), but never got round to making it so its ended up being lining fabric for quite a few other projects and I used it again for this. 

I cut the pattern out including the button tab twice (to make two bags), and earmarked two buttons from my collection for the closures. The fabric was really thick and I found it hard to sew straight lines as the grain of the fabric kept distorting the stitching line. For this reason, the button tabs ended up looking awful and I decided not to use them as they are optional anyway. 

I really enjoyed sewing this bag as it was a pretty quick project and the instructions were clear - an ideal make for a present. I'm pleased with the end result, I hope the two lovely ladies I've made these for like them too. 


I'll definitely be making more of these - they don't use much fabric so can be a great stash buster and the bag is a good size so very practical. Here is another pic which gives an idea of the size:


Monday 21 March 2016

Thinking of Spring - the Bettine dress

So yesterday was officially the first day of Spring and I finished my latest project, the definitely Spring-like Bettine dress from Tilly and the Buttons, last night.  While I saw some daffodils on a trip to the park yesterday afternoon, there is still a chill in the air that requires a winter coat in the mornings.  I wanted to make a casual dress that could be worn with my 70-denier opaques now, and (hopefully) with sandals when the weather is warmer.

I bought the Bettine pattern from Tilly at the Handmade Fair back in September, and I made a version soon after using some lovely black cotton lawn from Maud's Fabric Finds.  I wore it loads but it is now too big for me, which is a real shame as it was such a wardrobe staple.  I decided to make another version using some bargain fabric I bought in the sale from John Lewis back in January for £6 per metre.  I made the plain version last time, but decided to make the variation with pockets and sleeve cuffs this time.  I didn't buy the fabric with any project in mind and I didn't have quite enough to cut it according to the layplan.  I improvised and extended the facing pieces by 15mm then stitched together, rather than cutting on the fold.

The dress is really easy to sew up, and Tilly's instructions are super-clear as this is a beginner's pattern.  All was going well until I tried to attach the facings.  My attempt at extending and stitching together had worked brilliantly on the front facing, but I had somehow made the back facing too small.  I tried to stretch and ease it in, but still ended up with a couple of pleats.  Being keen to get the dress finished, I decided that I could get away with it because the fabric is quite drapey.  I hadn't put pockets into anything before, but I found them easy to do, and will definitely use them again as I really like the fact that the make the dress look really casual and modern.  I bought some buttons from John Lewis for the cuffs which also give the dress a different look.  Strangely, I had to make a lot of alterations to the hips last time as they stuck out, but I didn't need to alter the pattern at all in the smaller size.

The result is an every day dress that is extra comfy and I can hopefully get loads of wear out of (please excuse the slippers - as I said, it's still cold!):


On reflection, I can't get away with the back neckline facing - I'm wearing it today and I'm annoyed by it every time I catch my reflection in the mirror!  I'm going to unpick it and either make another facing or split this one and a piece to it.

I haven't got many pictures of the original Bettine I made, but I found this one (Thomas is modelling shorts that I made him here as well):


I would definitely recommend this pattern to sewers of any level - I'll be making plenty more.  I saw a pic on Instagram of a maxi dress version which I am tempted to try ready for Summer.


Friday 11 March 2016

Agnes x3

I have now returned to work following maternity leave, and have been forced out of my everyday uniform of t-shirts and sweatshirts.  While I can wear jeans to work, I do have to be smarter than for the school run.  Inevitably, smarter tops = more ironing, and we have mountains of ironing every week as it is.  So my quest has been to make some jersey tops that are smart enough, but I can get away without ironing.  My Mum bought the Agnes pattern from Tilly and the Buttons a while ago and has made several versions.  I love how may variations there are to make it quite different depending on fabric, sleeve length and type and plain or ruched front.  Mum made me an Agnes top for my birthday last year, which I loved.  She made it in my usual size, so it was a while before I felt comfortable wearing it, but it has now become a wardrobe staple.

I had several pieces of jersey fabric in my stash which I decided to use for this.  I bought some fabric at the Handmade Fair in September to make a jersey top.  This is a really thick jersey which holds its shape well.  I decided to make the plain front and ruched sleeves version as I thought the fabric would hold the ruching well.  It was lovely to sew with and the instructions were as clear as I've come to expect from Tilly.  I love sewing with jersey as it's so quick with no seams to finish.  I added about 2.5cm to the length as I prefer slightly longer tops with jeans.  I've already worn this one quite a few times (and it looks great without ironing - bonus!):


The next version I made was using some red spotty jersey which I think I bought from Plush Addict in the sale (it's a sign of a serious fabric addiction when you can't even remember where all of it comes from....).  It was much more drapey, and did stretch a bit while sewing, especially around the neckline, despite my best efforts.  I'm quite pleased with the final result, although I think I prefer it in a thicker jersey with less drape:


The final version here is actually the one my Mum made for me.  The type of fabric is really similar to the first one I made, but she made it with plain long sleeves and a ruched front (I had no make up on when the photo was taken, hence me asking Gareth not to include my face!):


Overall, I can't recommend this pattern highly enough - it's quick and straightforward to sew, really wearable and the variations mean you can create really different tops from the same pattern.  I will definitely be making plenty more Agnes tops soon - in fact, I have some pink jersey with black horses printed on it that I may even make an Agnes with this weekend!

Sunday 6 March 2016

Margot pyjamas for my Mum x

Happy Mother's Day to all the Mums out there.  My Mum is brilliant in more ways that I could possibly list here, but as this is a sewing blog, I'll focus on the inspiration she (and her Mum, my Grandma) have given me to make my own clothes.  My Grandma was an amazing seamstress and she taught my Mum to sew.  Grandma was the only person I knew who had a sewing room, and I kind of took it for granted that if I needed clothes altering, teddy bear's outfits making or new curtains, she would be on hand to make them.  I wish I had started sewing properly sooner (apart from a rubbish teenage attempt as a corduroy skirt), to ask her advice and draw on her incredible skills.   Mum is just as much of an inspiration - when we were little, she used to make matching party outfits for my sister and I and we could request pretty much any fancy dress outfit or costume for school plays and she would make them.  I think I always liked the idea of sewing (hence the attempt at the corduroy skirt) and she helped me when I asked her to, but I lost interest when it was too difficult and the skirt didn't make me look like the models in Just 17.

It is only in the last few years (after my Mum bought me my first machine a couple of Christmases ago) that I have really started sewing.  My expectations have been more realistic (I'm never going to look like a model, I'm 5'3" for starters!), and I have somehow learned to be patient along the way.  Since I have been sewing in earnest, my Mum has been my chief mentor and advisor.  Yes, I do consult YouTube, sewing magazines and books and have taken sewing classes, but nothing beats having your Mum at the end of the phone to ask questions to (or actually re-do whole sections of garments when I see her).

I bought some lovely sewing-themed cotton in the sale at John Lewis a few weeks ago with the plan to make some pyjama bottoms for Mum.  I made the Margot pyjama bottoms from Love at First Stitch for myself ages ago and they are my favourite pjs.  They are a really nice fit and super comfy.  I also made a paid for my sister the Christmas before last.  When cutting the fabric, I realised that I could fit both pattern pieces side-by-side in the size that Mum and I wear, so I managed to make two pairs - I can now match my Mum!  The fabric is perfect for two compulsive sewers:


I'm not with Mum today, so I couldn't get a pic of us both wearing them.  This is the pic she sent of her modelling them:

Here I am modelling mine, along with the Selfish Mother sweatshirt that my lovely kids bought me for Mother's Day - thanks Thomas and Polly xx


Thursday 3 March 2016

Ooh la la it's Fifi

All my recent makes have been for a specific event or purpose, so I decided to make something just for fun this week.  I bought the Fifi pattern from Tilly and the Buttons' stall at the Handmade Fair back in December, then bought some lovely grey cotton lawn with tiny black stars specifically for this project from Maud's Fabric Finds at the Christmas Handmade Fair in November.  The pattern is described as a 'boudior set', which I am guessing is a fancy way of saying 'Summer pyjamas'!  Strangely, Gareth showed more interest in this than pretty much any other sewing project I have undertaken.

I forgot to take may photos while I was sewing, but the end result is here (too shy to actually model them myself):


The fabric was cut on the bias for the top and on the straight grain for the shorts.  I've not made anything bias-cut before, and was nervous of the pieces stretching out of shape, so I stay-stitched them as soon as I cut them as recommended and they were actually fine to work with.  It was also the first time I have sewn french seams, although it definitely won't be the last.  I love the finish and also the feel of them for delicate fabric like this, and it's nice for the inside of a garment to be (almost) as beautiful as the outside.  The pattern calls for self-made bias binding for the shoulder straps but I cheated with ready-made as I liked the look of the solid black binding against the delicate fabric.

I thought this would be a more tricky make than it turned out to be from other reviews of the pattern I have read.  It was actually quite quick to sew up (probably because there isn't much to it in terms of fabric), and I'm already on the lookout for fabric to make my next Fifi ready for the Summer xx


Thursday 25 February 2016

Party time with Lilou

An unexpected invite to a black tie event arrived in my inbox a few weeks ago.  When I called Gareth to check he was around to look after the kids so I could go, he asked me if I had already been looking at dress patterns.  He knows me too well...

I have been looking for an opportunity to make the Lilou dress from Love at First Stitch by Tilly Walnes since I first got the book.  The pleated option with bow belt in matching fabric is a lovely retro-style cocktail dress:


I bought a red stretch cotton for the dress and Liberty tana lawn from the lining, both from Sew Over It.  I got the idea for using the tana lawn as lining fabric from a Joan Dress that was on display at the Sew Over It stall at the handmade fair.  I absolutely love sewing with tana lawn (I last used Liberty fabric for a tie for Gareth and a Sorbetto top for myself), it adds a real touch of luxury, and looks beautiful:


This was the second lined dress I have made.  Attaching the lining went well, but I found sewing it to the underarms tricky.  I was tempted to turn it right side out, but couldn't bear to turn it inside out, then back to the right side again afterwards, so I followed the instructions in the book and it turned out fine.  The pleats were made using a method that was new to me, and I have to re-read the instructions several times before finally pinning it correctly.  I love the movement and fullness they give to the skirt.  I had to adjust the fit on the bodice by taking a 2cm seam allowance on the back seam, and I think I could take taken more off.  I think I might need to start making the next size down in Tilly's patterns soon (yippee!).  Annoyingly, the waistband seam wasn't level after inserting the zip (seems to be a recurring problem for me at the moment).  At least it is hidden by the bow belt!

I ended up having to ask my Mum for some help with adjusting the fit at the shoulders - she had to unpick the lining and reattach to make the adjustments.  I think I might start making a toile for any bigger dress projects in future to avoid this.  The bow belt ended up being trickier than I thought it would be, but I love it.  I added poppers as well as hook and eye so that it would definitely sit straight.

Here is the finished result (modelled before all the champagne):


It was a great night (The Sunday Times 100 Best Companies to Work For awards dinner - we came 43rd), and I'll definitely be wearing Lilou again.

I joined Instagram a couple of weeks ago and am already slightly addicted to all the lovely sewing and fabric related posts.  You can see more of what I have been up to at @adventuresinfabric

Finally, I was the lucky recipient of this stash of vintage sewing magazines last week:


I'm very excited about trying out some vintage sewing projects soon! x